We've almost seen all there is to see of the button widget. It's pretty simple. You can use the gtk.Button() function to create a button with a label by passing a string parameter, or to create a blank button by not specifying a label string. It's then up to you to pack a label or pixmap into this new button. To do this, create a new box, and then pack your objects into this box using the usual pack_start() method, and then use the add() method to pack the box into the button.
The function to create a button is:
button = gtk.Button(label=None, stock=None) |
if label text is specified it is used as the text on the button. If stock is specified it is used to select a stock icon and text label for the button. The stock items are:
STOCK_DIALOG_INFO STOCK_DIALOG_WARNING STOCK_DIALOG_ERROR STOCK_DIALOG_QUESTION STOCK_DND STOCK_DND_MULTIPLE STOCK_ADD STOCK_APPLY STOCK_BOLD STOCK_CANCEL STOCK_CDROM STOCK_CLEAR STOCK_CLOSE STOCK_CONVERT STOCK_COPY STOCK_CUT STOCK_DELETE STOCK_EXECUTE STOCK_FIND STOCK_FIND_AND_REPLACE STOCK_FLOPPY STOCK_GOTO_BOTTOM STOCK_GOTO_FIRST STOCK_GOTO_LAST STOCK_GOTO_TOP STOCK_GO_BACK STOCK_GO_DOWN STOCK_GO_FORWARD STOCK_GO_UP STOCK_HELP STOCK_HOME STOCK_INDEX STOCK_ITALIC STOCK_JUMP_TO STOCK_JUSTIFY_CENTER STOCK_JUSTIFY_FILL STOCK_JUSTIFY_LEFT STOCK_JUSTIFY_RIGHT STOCK_MISSING_IMAGE STOCK_NEW STOCK_NO STOCK_OK STOCK_OPEN STOCK_PASTE STOCK_PREFERENCES STOCK_PRINT STOCK_PRINT_PREVIEW STOCK_PROPERTIES STOCK_QUIT STOCK_REDO STOCK_REFRESH STOCK_REMOVE STOCK_REVERT_TO_SAVED STOCK_SAVE STOCK_SAVE_AS STOCK_SELECT_COLOR STOCK_SELECT_FONT STOCK_SORT_ASCENDING STOCK_SORT_DESCENDING STOCK_SPELL_CHECK STOCK_STOP STOCK_STRIKETHROUGH STOCK_UNDELETE STOCK_UNDERLINE STOCK_UNDO STOCK_YES STOCK_ZOOM_100 STOCK_ZOOM_FIT STOCK_ZOOM_IN STOCK_ZOOM_OUT |
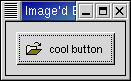
The buttons.py program provides an example of using gtk.Button() to create a button with an image and a label in it. I've broken up the code to create a box from the rest so you can use it in your programs. There are further examples of using images later in the tutorial. Figure 6.1, “Button with Pixmap and Label” shows the window containing a button with both a pixmap and a label:
The source code for the buttons.py program is:
    1   #!/usr/bin/env python
    2
    3   # example-start buttons buttons.py
    4
    5   import pygtk
    6   pygtk.require('2.0')
    7   import gtk
    8
    9   # Create a new hbox with an image and a label packed into it
   10   # and return the box.
   11
   12   def xpm_label_box(parent, xpm_filename, label_text):
   13       # Create box for xpm and label
   14       box1 = gtk.HBox(False, 0)
   15       box1.set_border_width(2)
   16
   17       # Now on to the image stuff
   18       image = gtk.Image()
   19       image.set_from_file(xpm_filename)
   20
   21       # Create a label for the button
   22       label = gtk.Label(label_text)
   23
   24       # Pack the pixmap and label into the box
   25       box1.pack_start(image, False, False, 3)
   26       box1.pack_start(label, False, False, 3)
   27
   28       image.show()
   29       label.show()
   30       return box1
   31
   32   class Buttons:
   33       # Our usual callback method
   34       def callback(self, widget, data=None):
   35           print "Hello again - %s was pressed" % data
   36
   37       def __init__(self):
   38           # Create a new window
   39           self.window = gtk.Window(gtk.WINDOW_TOPLEVEL)
   40
   41           self.window.set_title("Image'd Buttons!")
   42
   43           # It's a good idea to do this for all windows.
   44           self.window.connect("destroy", lambda wid: gtk.main_quit())
   45           self.window.connect("delete_event", lambda a1,a2:gtk.main_quit())
   46
   47           # Sets the border width of the window.
   48           self.window.set_border_width(10)
   49
   50           # Create a new button
   51           button = gtk.Button()
   52
   53           # Connect the "clicked" signal of the button to our callback
   54           button.connect("clicked", self.callback, "cool button")
   55
   56           # This calls our box creating function
   57           box1 = xpm_label_box(self.window, "info.xpm", "cool button")
   58
   59           # Pack and show all our widgets
   60           button.add(box1)
   61
   62           box1.show()
   63           button.show()
   64
   65           self.window.add(button)
   66           self.window.show()
   67
   68   def main():
   69       gtk.main()
   70       return 0
   71
   72   if __name__ == "__main__":
   73       Buttons()
   74       main()
|
Lines 12-34 define the xpm_label_box() helper function which creates a horizontal box with a border width of 2 (lines 14-15), populates it with an image (lines 22-23) and a label (line 26).
Lines 36-70 define the Buttons class. Lines 41-70 define the instance initialization method which creates a window (line 43), sets the title (line 45), connects the "delete_event" and "destroy" signals (lines 48-49). Line 55 creates the button without a label. Its "clicked" signal gets connected to the callback() method in line 58. The xpm_label_box() function is called in line 61 to create the image and label to put in the button in line 64.
The xpm_label_box() function could be used to pack xpm's and labels into any widget that can be a container.
The Button widget has the following signals:
      pressed - emitted when pointer button is pressed within Button widget

      released - emitted when pointer button is released within Button widget

      clicked - emitted when pointer button is pressed and then released within Button widget

      enter - emitted when pointer enters Button widget

      leave - emitted when pointer leaves Button widget
|